A full guide for those new to designing!
Skip to:
- Species & Covering - Base Coat - Markings & Genetics - Minimal Markings - Dimorphic Markings - Submission Process -
Species and Covering
To start your design, first look at the Species, than head to our species information pages from the main navigation bar, under 'Genetics > Species'.
From here, click on the name of the species that matches your dinosaur and scroll to the bottom of the page. Here, you will see several tabs with multiple bases; one 'Standard' tab and several other tabs.
Primeval Age dinosaurs come in two different Coverings: Bald and Feathered. From these Coverings, there are Variants, currently three for each covering, which is how the covering is expressed:
- Standard is the default variant, this tab includes the files for the standard bald and standard feathered.
-- If you are designing a Newbie geno or a Starter lineaged Adoption Center geno, you will likely be using this! - Spiked & Quilled are Bald Variants which are options you can change a dinosaur into, if you have an applicator for them.
- Crested & Scruffy are Feathered Variants which are options you can change a dinosaur into, if you have an applicator for them.
You will download the matching base for your dinosaur! If you have a Standard Bald dinosaur, then you would use the Standard Bald base. You can download the PSD by clicking the preview image, or use the link above each image for an alternate PNG template.
Most Genos will start out as a Standard Variant. To change them to one of the other non-Standard Variants, you will need an applicator item. These can be purchased from the Relic Bone Shop, or crafted using common materials dropped from quests.
Base Coat
Now that we have the base downloaded that we want to use, the next step is to find the base color. This will be on the geno, labeled as the base color, as an rgb code - so for the example rgb(153,144,144).
NOTE: If you have an old geno from DeviantArt, it might have a color written out next to the genes - this color is the base color, and has no affect on the marking colors! Markings use their own color guidelines separate from the base color and do not have to be derived from your base color.
The RGB base color is what you must use for your dinosaur’s base.
On bald dinosaurs, the base color is the skin color. On feathered dinosaurs, the base color is the feather color.
Feathered dinosaurs can have a slightly lighter or darker skin color if desired, a more in depth guide can be found in the Base Coat Guide.
Base colors cannot have accents nor nuances - this means you cannot add slight gradients to the base without the presence of a marking!
Markings and Genetics
Marking colors are not based on the base color, and instead follow their own individual marking rules!
You can choose any color as long as its not too dark and not more saturated than the color palette here, though they can be less saturated. Keep in mind some markings have their own unique palettes, like Appaloosa, that must be adhered to!
Every dinosaur has Genes - these are the “blueprint” for what markings you are allowed to use on that particular character.
Every marking has two possible forms: Het or Hom - this denotes the different ranges the marking is allowed to present in, and sometimes differences in how they can be colored.
- Het Markings are always displayed as one uppercase letter, usually followed by a lowercase letter.
-- For example, C is Het Collared and Sb is Het Sable. - Hom Markings will always be all uppercase with no lowercase letters.
-- For example, CC is Hom Collared and SBSB is Hom Sable.
So for example lets look at this geno: RMRM / Si / Sl
This means it has Rimmed in the Hom form, Siamese in the Het form, and Sleeves in the Het form
Our marking rules are still on Weebly! To see a marking’s info, you go to the Marking Info & Ranges page and click on the marking you want. From there you can download the marking range for the species you’re designing - markings present slightly differently on every species!
So for Rimmed, an example range looks like this...
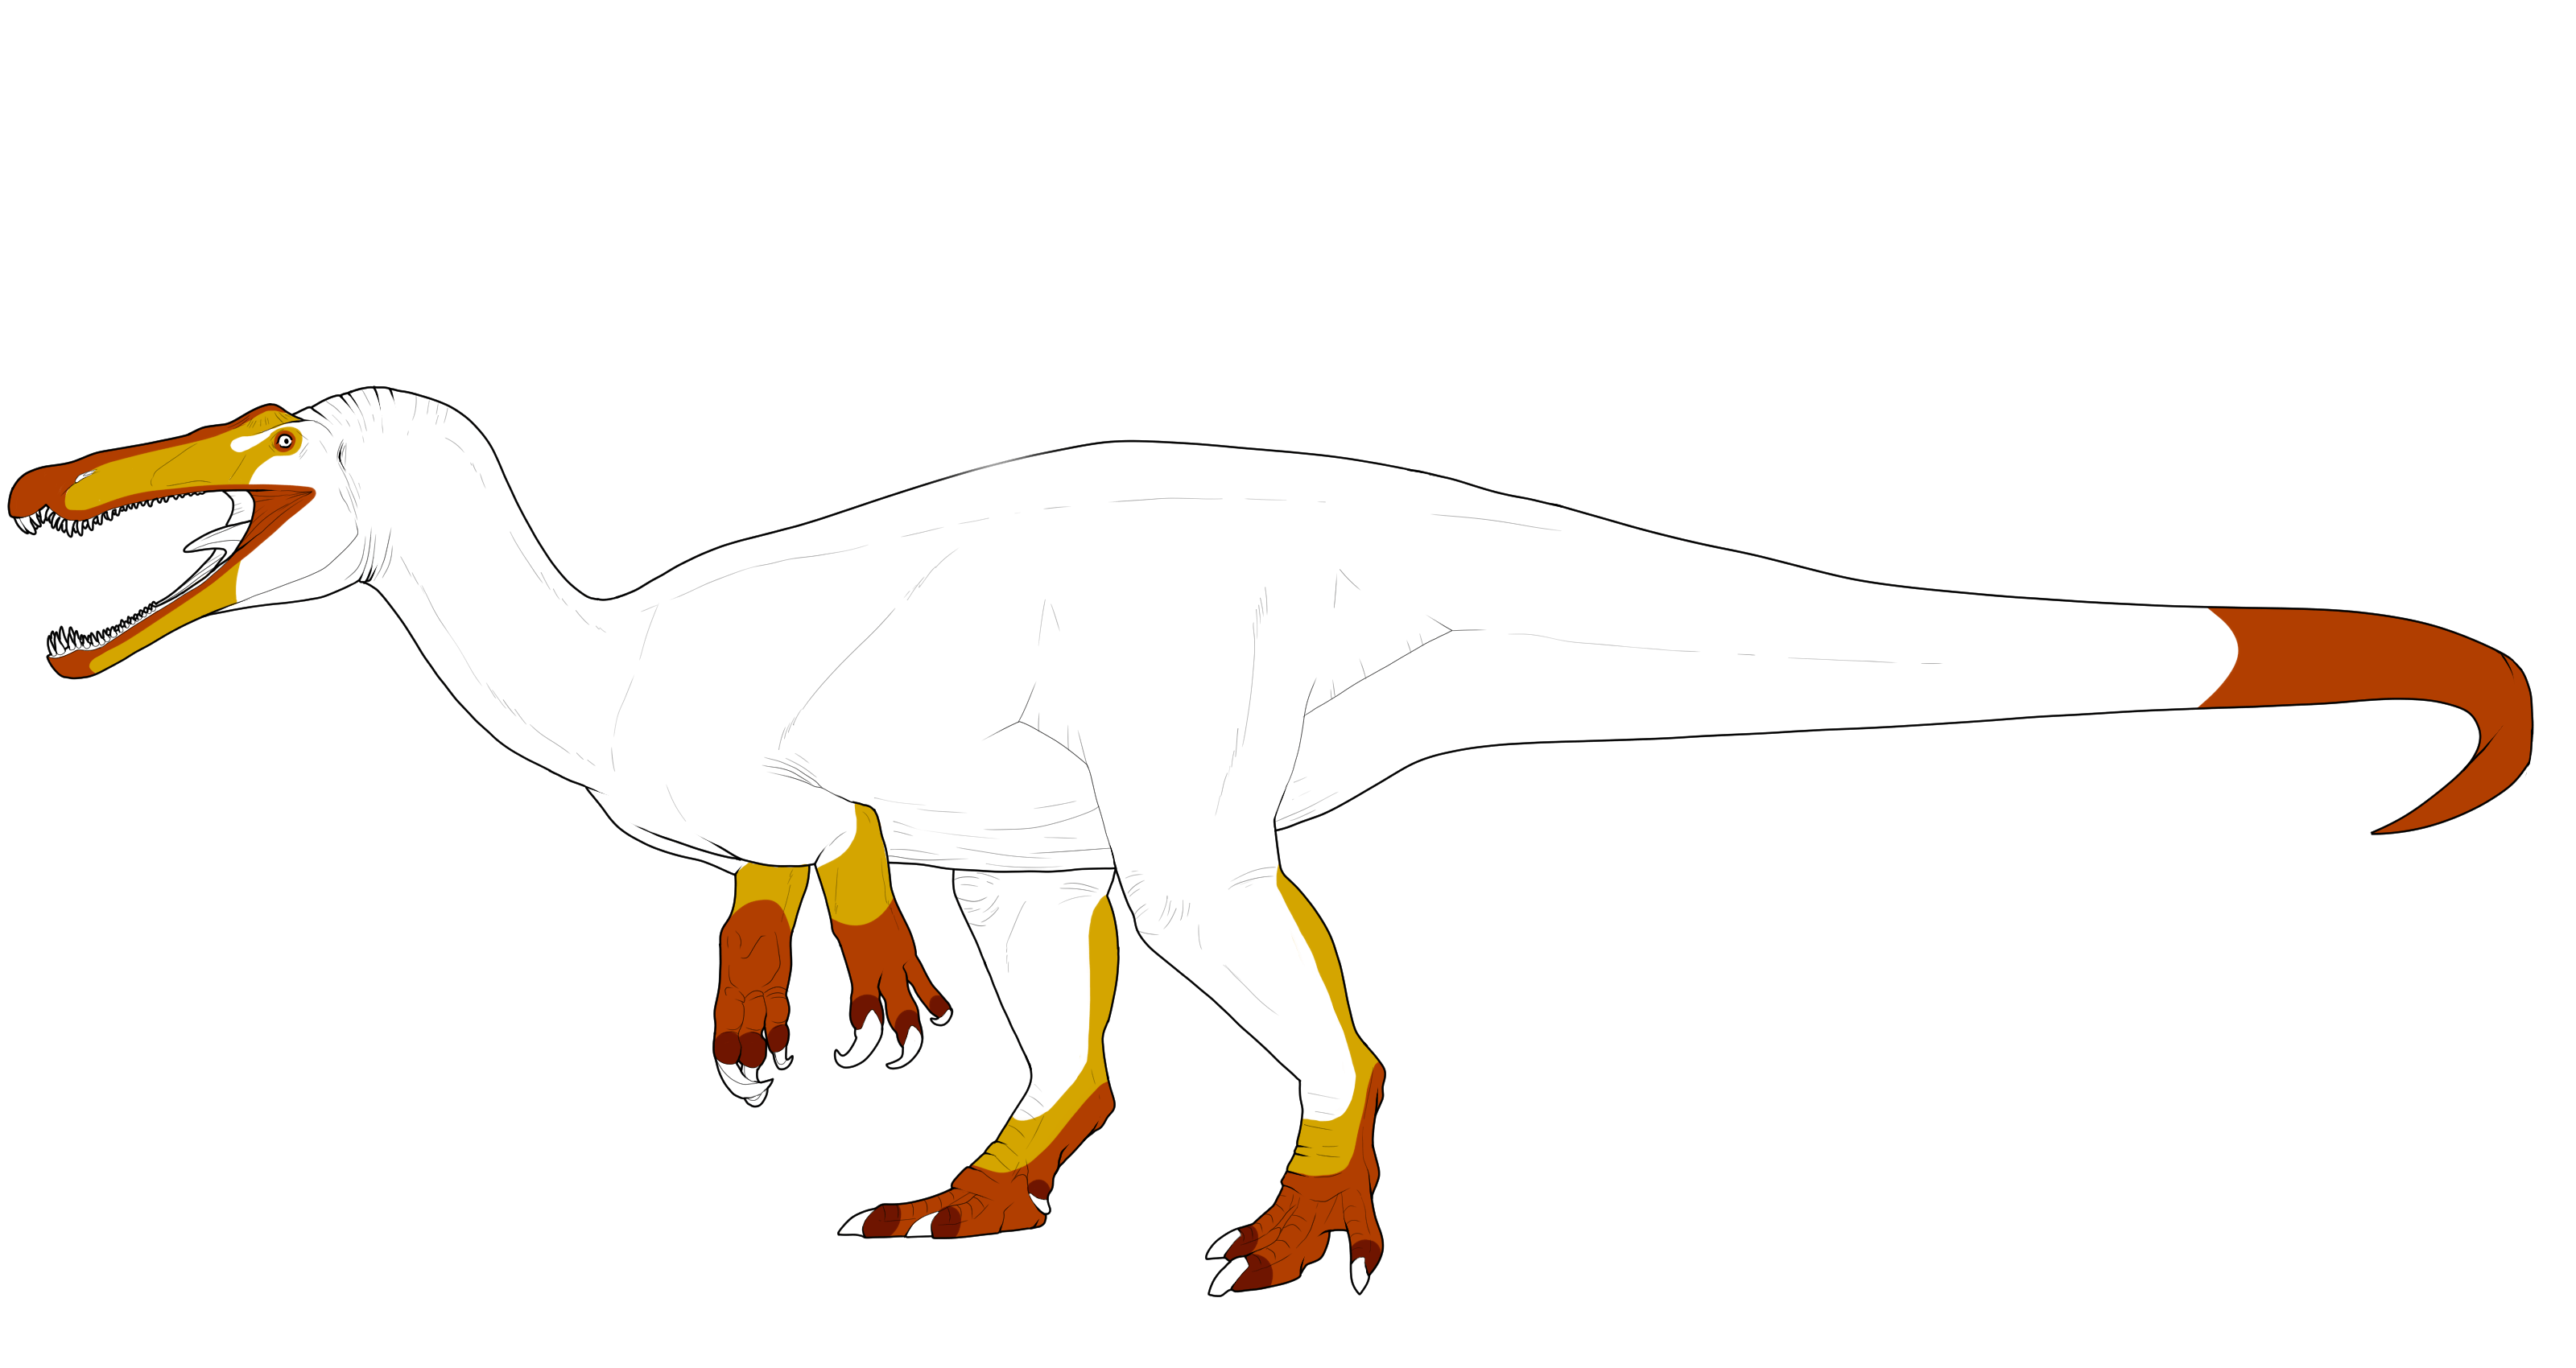
- Dark red - The minimum area for all forms of the marking.
-- Markings do not need to completely fill the minimum area. - Orange - The Het range.
-- Both Het and Hom forms of a marking can use this area. - Yellow - The Hom range.
-- Only the Hom form of a marking can extend into these areas. - White - Out of range for all forms of the marking.
For our example geno, Hom Rimmed would be allowed in any of the colored areas, as long as the minimum range is touched!
Minimal Markings
Sometimes referred to as “min marks”, these are small, extra markings that you can apply to your dino that exist outside of their Genes! They follow the same color rules as normal markings, but do not have any rarity or Het/Hom forms, and are not passed down genetically. There is no limit to how many minimal markings you can apply, however you can only apply one of each.
Minimal markings can only be applied to genos - they cannot be used on dinosaurs/imports that have already been created, unless you use a Makeover Formula. To apply a minimal marking, select the item in your inventory and pick the dinosaur you wish to apply it to before submitting your design for review! If minimal markings are applied to an already approved import, it will invalidate your dinosaur and you won't be able to participate in the group with them until you submit a design update with a Makeover Formula.
Most minimal markings are purchased from the Relic Bone shop, and a few are purchased from the seasonal currency stores or obtained via crafting!
Dimorphic Markings
Dimorphic markings are special markings that are inherited by male dinosaurs, from their Fathers and Grandfathers over generations! In many cases, you can identify specific lineages from the dimorphic marking alone. They can be any color and may mimic other markings! Dimorphic markings can affect any visible part of the dinosaur, other than the teeth. Dimorphic markings are optional and you can always choose to not include them if you don't like how they look on your dinosaur. This would make your male dimorphic-less.
Females can have cosmetic dimorphic markings with the use of a Parallel Dimorphic item. They follow the all the same design rules as if the dinosaur was male. The Mother can not pass this dimorphic marking onto her offspring; but the offspring can still inherit the same dimorphic marking from their Grandfather(s), if applicable.
The appearance of a dimorph depends on if your character has a lineage or not! If you are designing a male Newbie geno or a Starter lineaged Adoption Center geno, you will be using the shape, placement, and exact color from your dinosaur's father; unless you are using Newts to edit the dimorphic marking.
Submission Process
Make sure you save your design as a PNG at the same resolution as the file you downloaded, with a transparent background and the credits. Backgrounds are automatically added by the site, so do not include them!
Once your design is ready to submit, you will hit the 'Submit Design’ button on the geno’s site page. This can be found at the bottom of their sidebar on the lefthand side of the screen; accessed via the 'Menu' button on mobile.
- From there, you will click Create Request, which will bring you to the design request page.
- Here you'll need to go through each of the tabs (Comments, Masterlist Image, Add-Ons, and Adjustments) and add any needed info & hit save. You'll know a tab is good to go when it has a green circle on it!
- In the comments box you can provide links to making breakdowns, "other sides" for asymmetrical designs, or any other comments for the approving mods to consider when checking the design!
- For the Masterlist Image, this is where you upload the import image with the transparent background. You will also use the cropping tool on the page to create your imports thumbnail!
- Add-Ons is where you'll attach any items that aren't applied to the import from your inventory such as dimorphic items.
- Adjustments is where you check and select changes caused by applied items. In most cases, you'll just leave this page as-is.
- On the Status Tab you can then hit 'Submit Request' to submit your design! When a mod checks it, if any edits are needed you will get the request sent back to you as a draft so you can upload a corrected import image.
You can also save your design submission as a draft if you're not ready to submit it. As long as the design form is not submitted, it will permanently remain as an editable draft unless you delete it!
When a mod checks your design request, if any edits are needed you will get the request sent back to you as a draft so you can upload a corrected import image. As a note, the site saves import images to your browser's cache for faster loading times. When you reupload the new corrected version for approval, it will appear as if the image hasn't changed. However, it will still go through correctly as the new image! To see the updated version, you'll need to clear your browser's cache; this depends on your browser and we recommend you search for a guide on how to do so.
When your design is approved, it's made into an import it'll be added to your page under 'User > My Imports'. At this point, you will be able to play the game with the import!